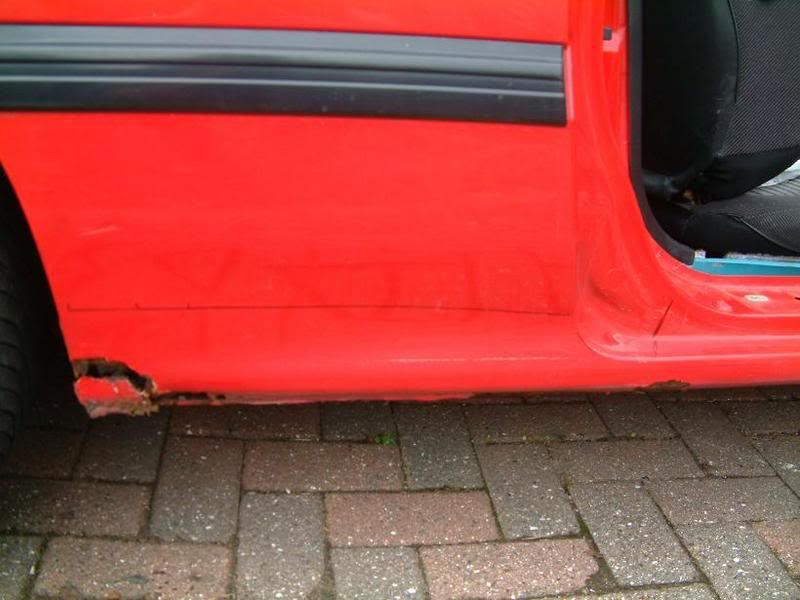
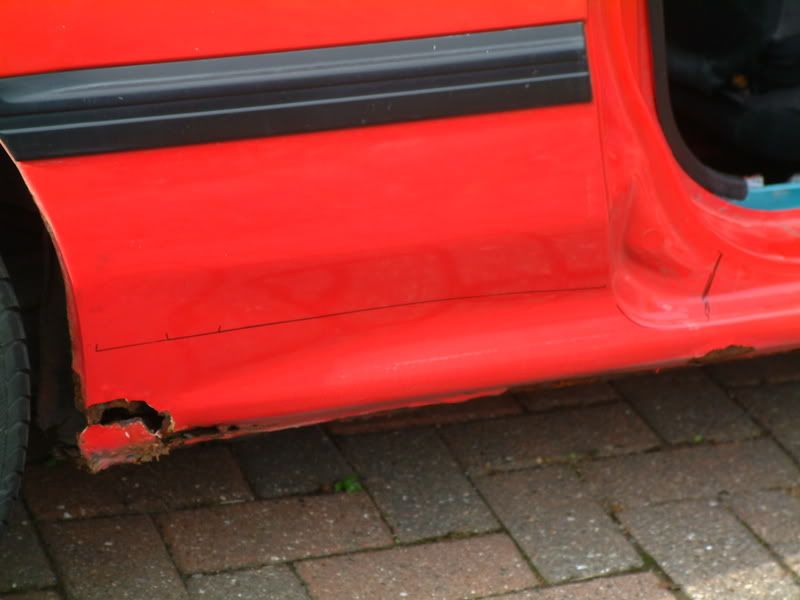
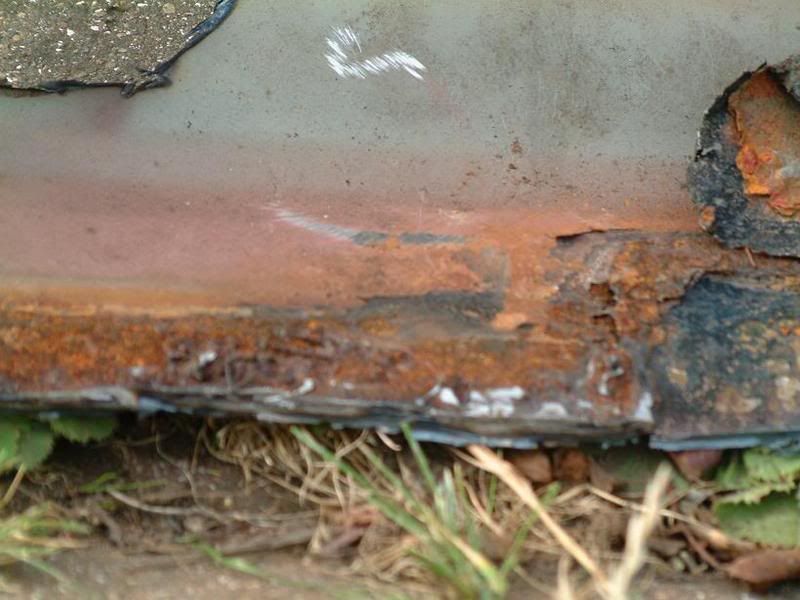
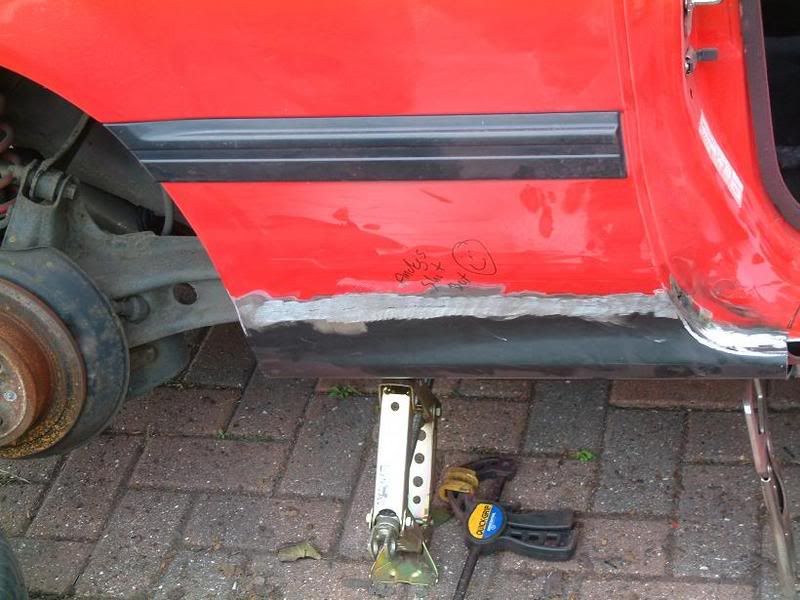
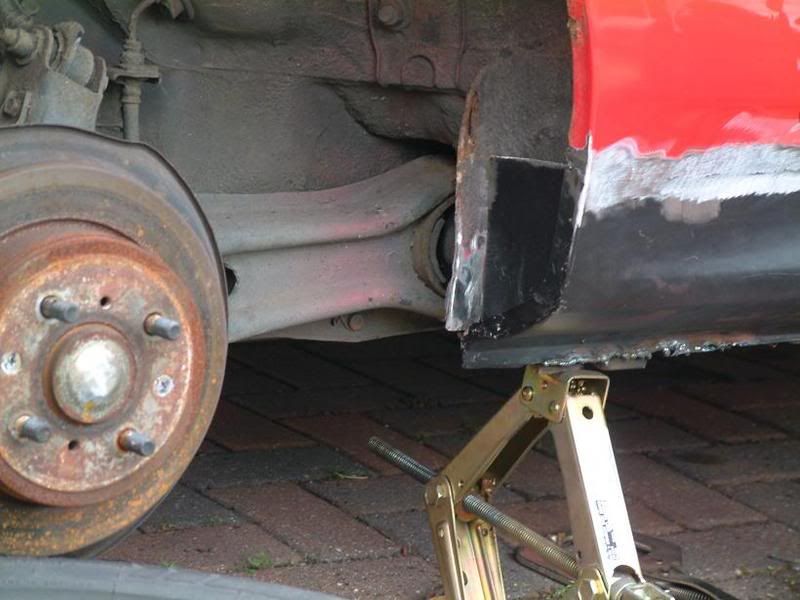
Firstly, decide if it needs work, this one quite obviously did
Secondly get an ace welder man, I'm lucky that a Spiderpig lives close by
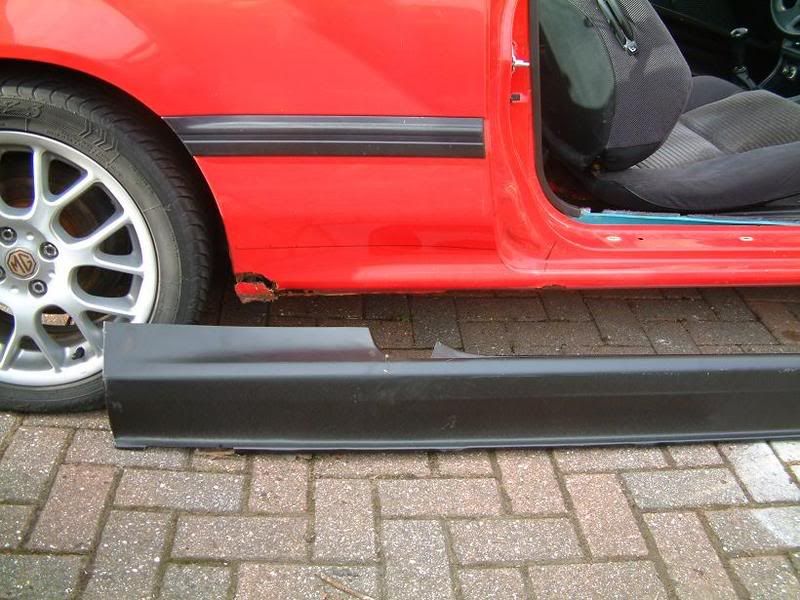
Draw around the new sill...
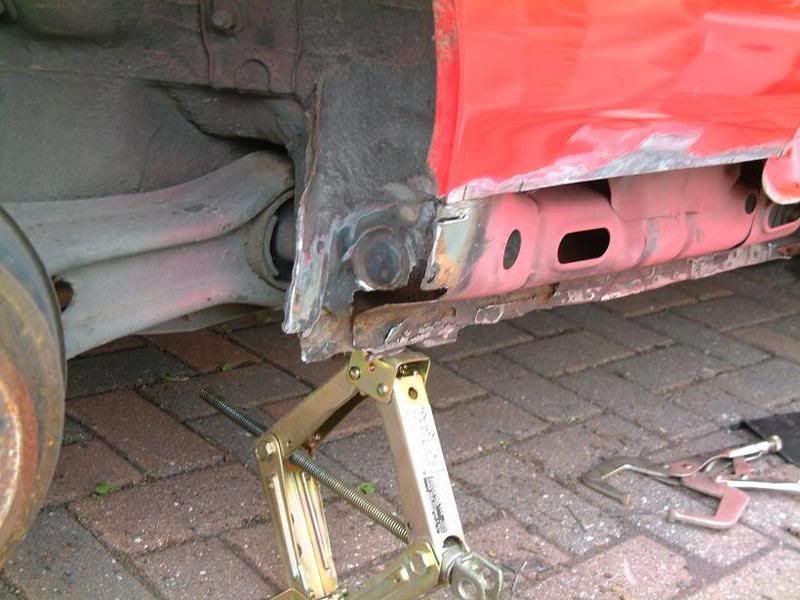
Remove the rotten part...

Cut the new sill to match the gap..
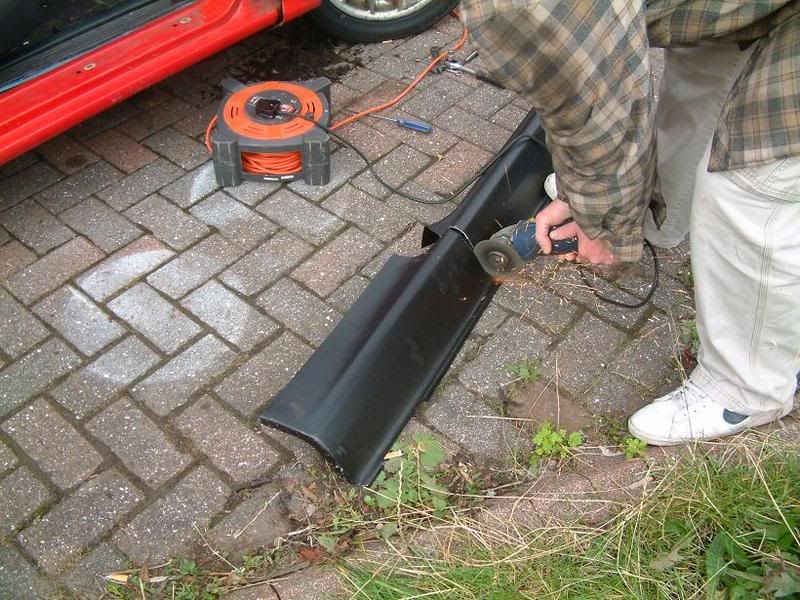 e new sill to match the gap..
Looks like its been repaired before
Bit of access required... Jack it up, ( be sure it is secure
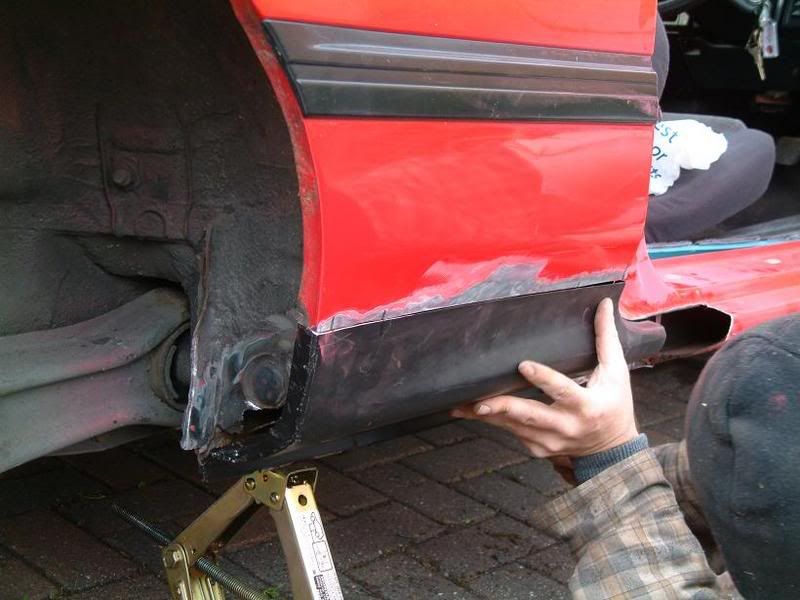
Offer the new part to the car
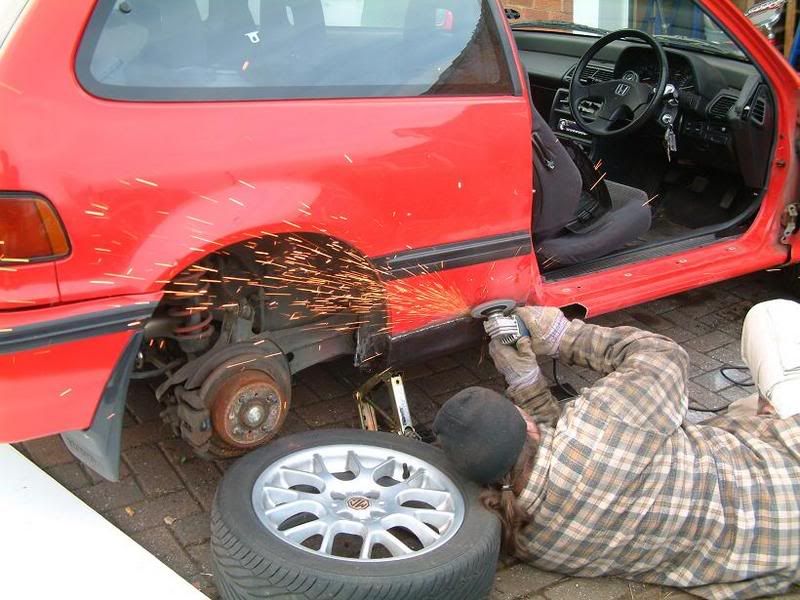
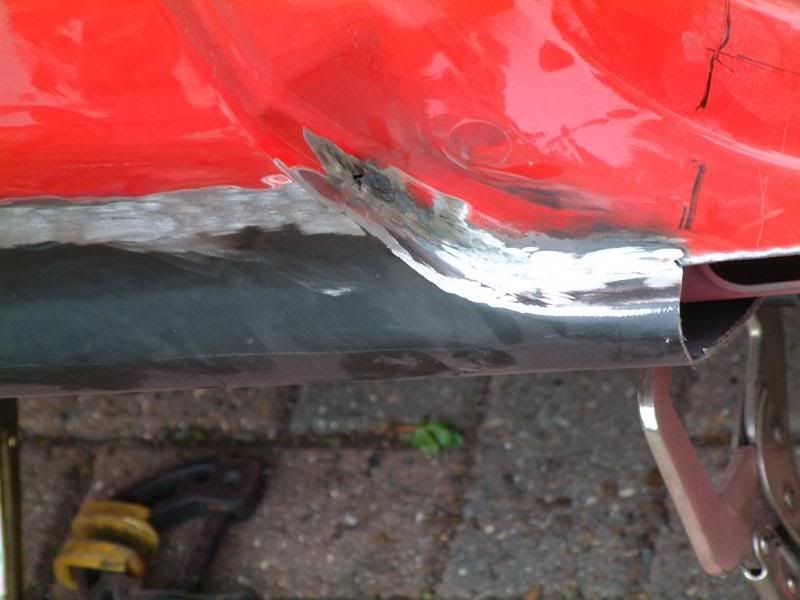
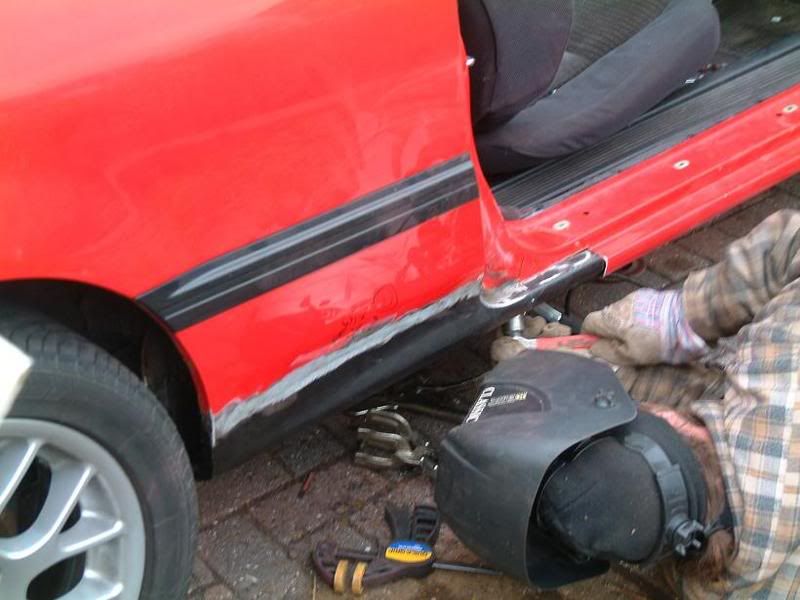
Weld it up along the edge

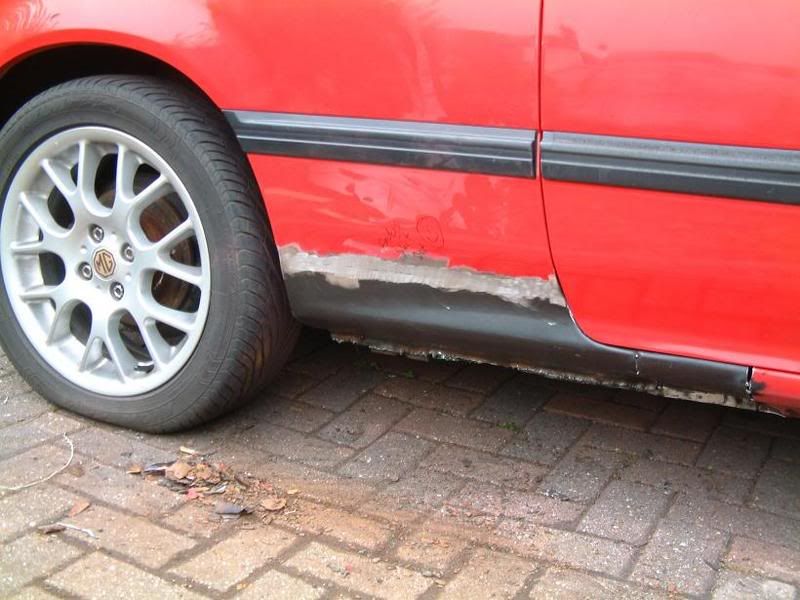
Grind the weld flat
Looks good
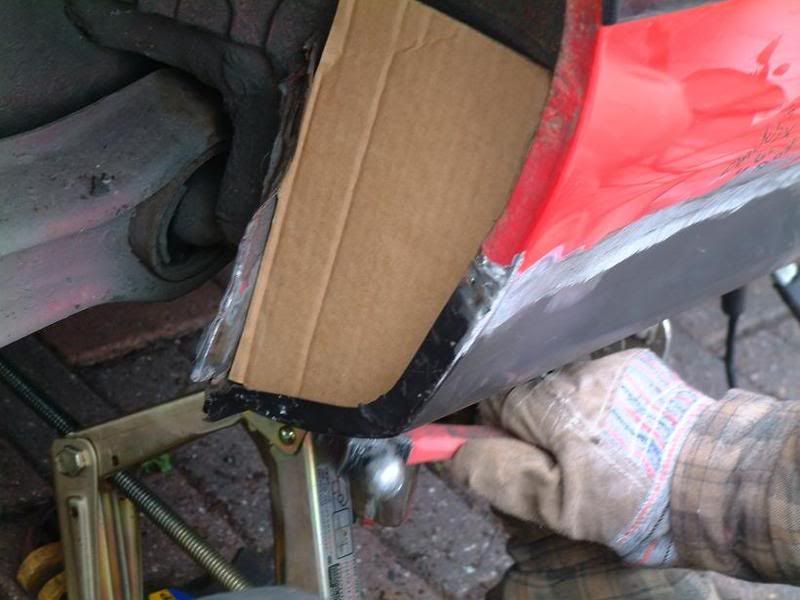
Awkward corners and edges....
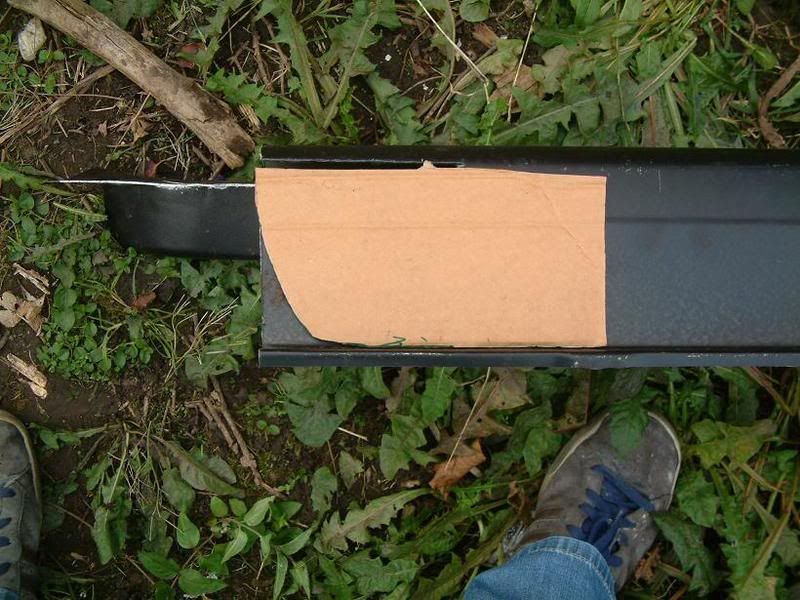
Use cardboard for templates in hard to reach areas
Some spare metal for the plate
Weld it in place
Weld the bottom seam
And thats it for today...
To recap, you will need
1. Rotton sill
2. New sill
3. Ace welder and kit
4. Tea and tabs for the ace welder
5. A grumpy neighbour to complain your drive is a garage ( I wish I had taken a pic, cause he is a whingy nothing better to do neighbour!)
Bit more filler welding, another grind, some bodge to set the lines and paint. Job will be agood one.
** Brought to you by Streakers rotton Turbo and Spiderpig ( who did all the work