my 1991 EE9 i-VT!!


-
danxs
- Lvl5! Turbo Charged Posting

- Posts: 1400
- Joined: Mon Nov 12, 2007 10:48 pm
- Location: walsall - birmingham
ive cleaned that one aswell just, took both ends off and thoroughly cleaned with carb and intake cleaner and rebuilt, topped the water up and bled system, reset the ecu and started it up, its settled down a little more but its still really annoting me, up and down, up and down... what else can i try??

i-vt gone
b20 gone
mb6
-
SteveRowe
- Lvl4 Nos Enhanced Poster

- Posts: 767
- Joined: Sat Oct 30, 2004 9:42 pm
- Location: Scottish borders
My honda did that , i didnt loose any sleep over it like you are  as long as it starts ,gos and stops dont worry about it , nice colour for the rocker cover i think the oil cap wreaks it tho
Austin Mini 1330cc
Rover Mini 1293cc
Rover Mini 1293cc
SteveRowe wrote:in that case my opinion is ... your a fanny ....shak 786 wrote:im intitled to my opinion
-
SteveRowe
- Lvl4 Nos Enhanced Poster
- Posts: 767
- Joined: Sat Oct 30, 2004 9:42 pm
- Location: Scottish borders
Just tell them its got fancy cams and its ment for going not siting talking about itdanxs wrote:
well im not loosing sleep its just crap when you pull up to meet people and your car is up and down and up and down, makes it look rubbish lol
Austin Mini 1330cc
Rover Mini 1293cc
Rover Mini 1293cc
SteveRowe wrote:in that case my opinion is ... your a fanny ....shak 786 wrote:im intitled to my opinion

-
danxs
- Lvl5! Turbo Charged Posting
- Posts: 1400
- Joined: Mon Nov 12, 2007 10:48 pm
- Location: walsall - birmingham
what a day!!!
yesterday i borrowed a welder off mamj and got some fresh wire and co2 for it and set to work on the driver side of the car, repairing the sills and inspecting the rear arch.
the sills went ok, 4 patches and its a sgood as new ready for the skirt to go back on.... but the arch was shafted and the inner arch was completley rotten away and i could stick my hand in
so today i got my repair panels out and i have cut the drivers sire rear arch off at the front (the top was ok, rear was suspect but didnt have time today) and fitted my repair pannel, re attached to jacking point and sill, and repaired the rear of the sill aswell as rebuilt the inner arch at the front of the rear wheel
i have finished the inside of the arch and everything is welded and secure so i set about grinding the welds down ready for fillering to hide the repair.
ive done one layer of filler, flatted down and left for today as its been a long day!!!!
i will add the pics shortly and more detail!!!!
next day off i will be finishing it and then starting on the rear section and then onoto the passenger sill and rear arch
so fingers crossed in a month or so it will be completley rust free and ready for a spray with my new panels and folding mirrors on etc
just to add ive never welded before in my life
yesterday i borrowed a welder off mamj and got some fresh wire and co2 for it and set to work on the driver side of the car, repairing the sills and inspecting the rear arch.
the sills went ok, 4 patches and its a sgood as new ready for the skirt to go back on.... but the arch was shafted and the inner arch was completley rotten away and i could stick my hand in
so today i got my repair panels out and i have cut the drivers sire rear arch off at the front (the top was ok, rear was suspect but didnt have time today) and fitted my repair pannel, re attached to jacking point and sill, and repaired the rear of the sill aswell as rebuilt the inner arch at the front of the rear wheel
i have finished the inside of the arch and everything is welded and secure so i set about grinding the welds down ready for fillering to hide the repair.
ive done one layer of filler, flatted down and left for today as its been a long day!!!!
i will add the pics shortly
next day off i will be finishing it and then starting on the rear section and then onoto the passenger sill and rear arch
so fingers crossed in a month or so it will be completley rust free and ready for a spray with my new panels and folding mirrors on etc
just to add ive never welded before in my life
i-vt gone
b20 gone
mb6
-
danxs
- Lvl5! Turbo Charged Posting
- Posts: 1400
- Joined: Mon Nov 12, 2007 10:48 pm
- Location: walsall - birmingham
heres some pics
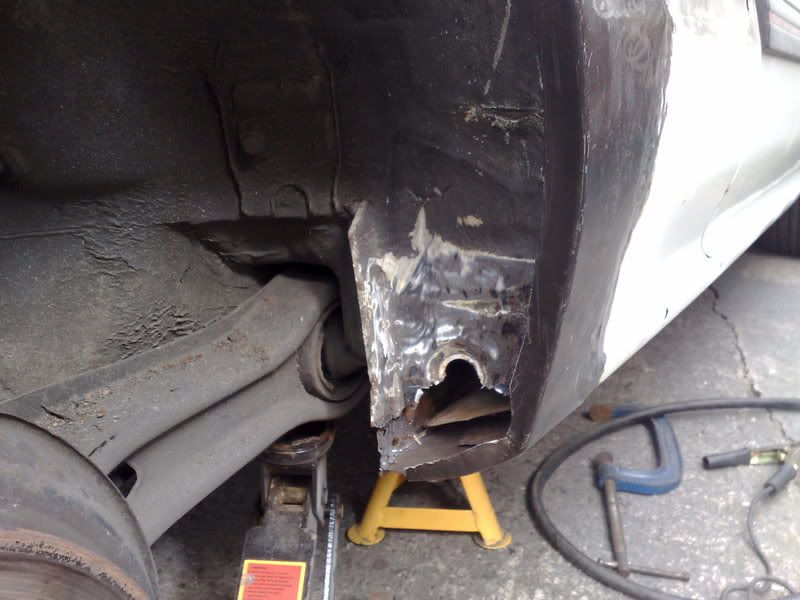
this is how the end of my sill looked when i jacked car up and removed wheel and a bit of mud lol
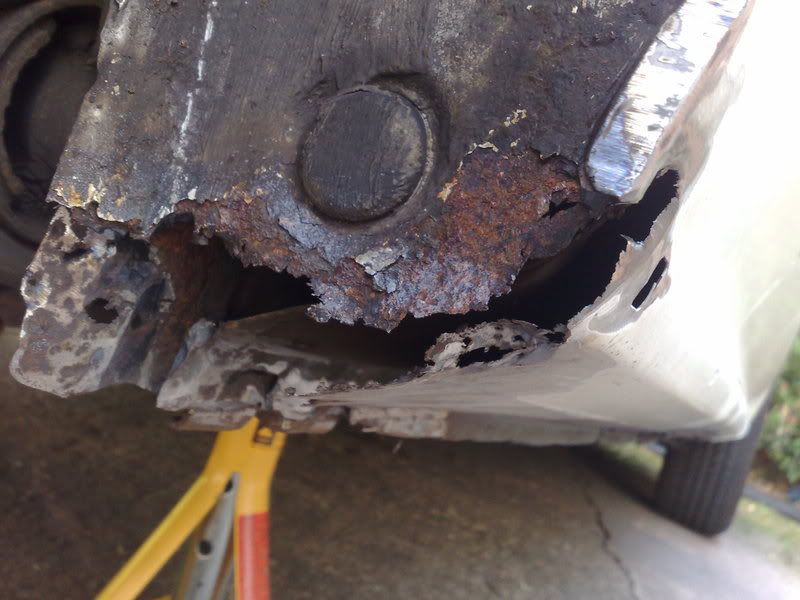
i ground some of the rust back on the arch, it was right through and it was the inner arch that was really rusty
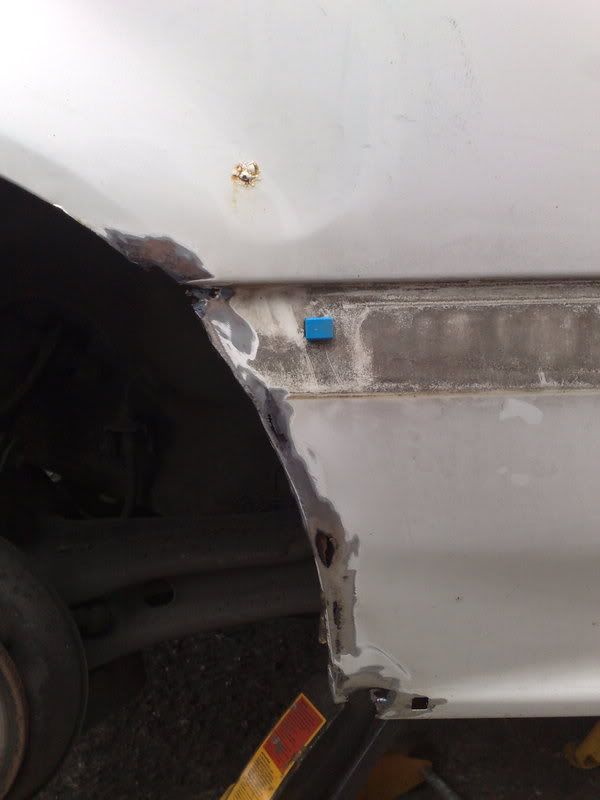
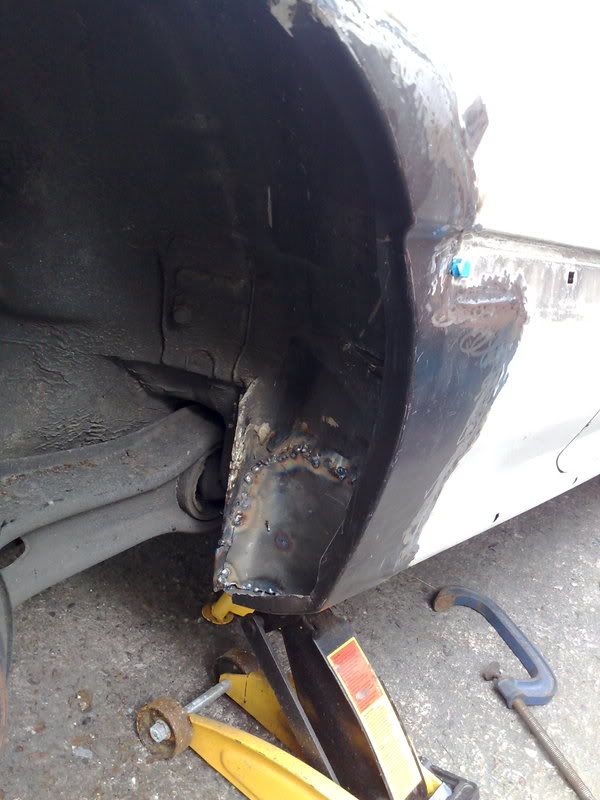
so i cut my repair panel out and ground sill back to suit and welded it on (not the best of welders as it was only my second attempt lol)

then ground the welds back a touch
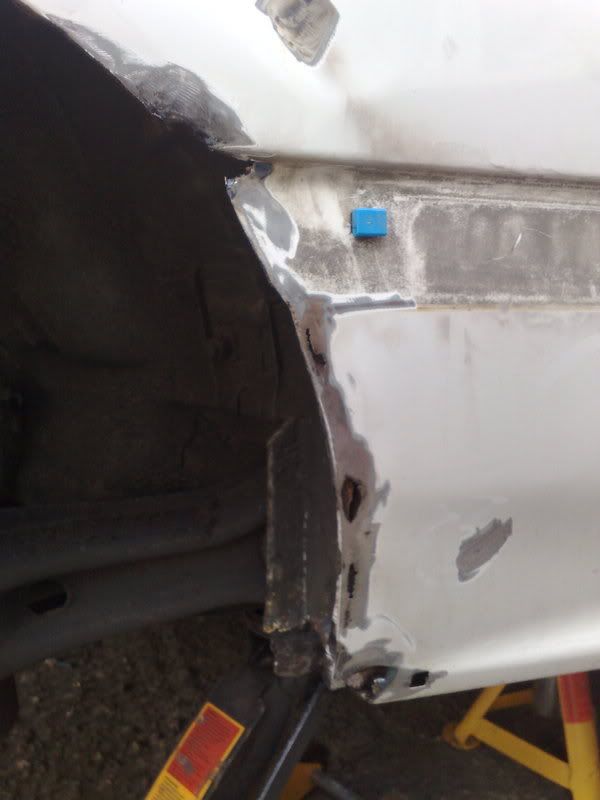
then got on with grinding the crap metal back inside the arch so i could repair the inner arch and sill.
at this point i had to patch the inside of the sill (by the rta bush) but never took a pic
i then made a template from cardboard so i could fill in the end of the sill and inner arch join where it had rotted worst
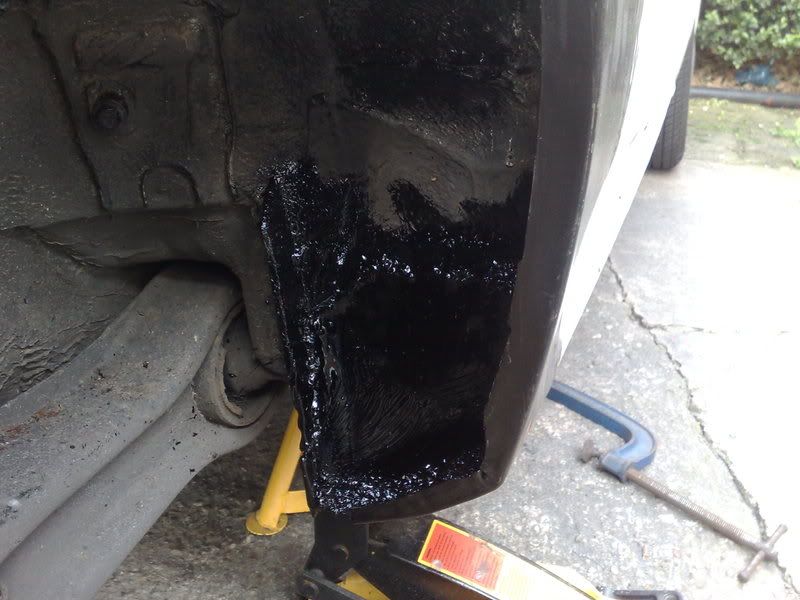
i transferred to metal and trimmed it slowly till it fitted nice and started to weld it in
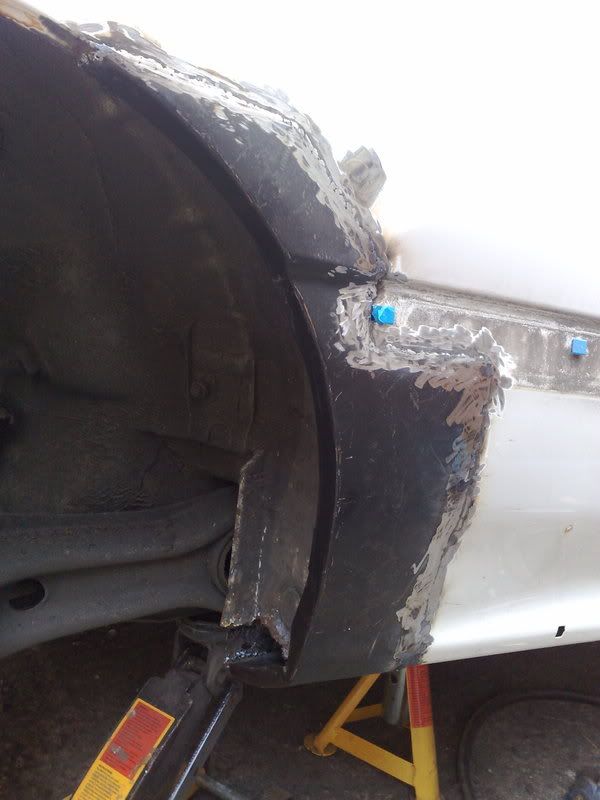
once dry i added loads of underseal lol
i then set about fillering the joint so that the weld wasnt on display
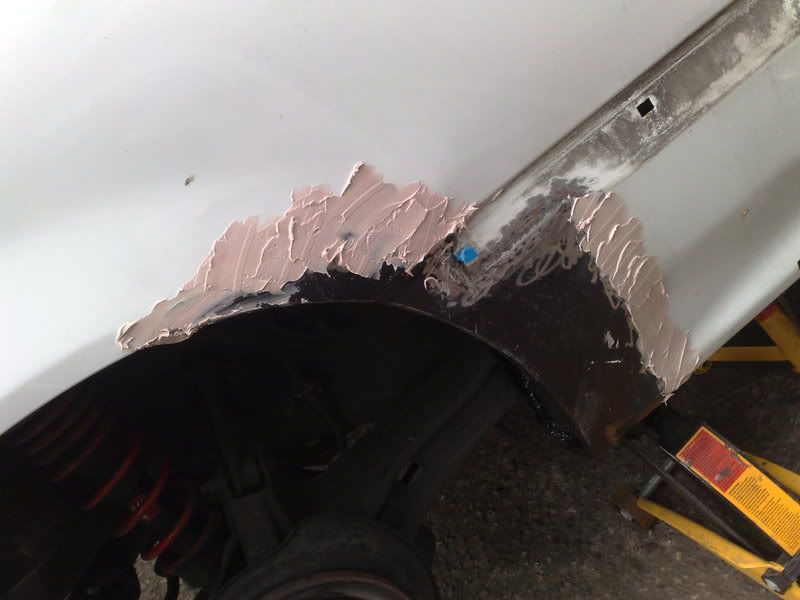
flatted back a touch

and some more
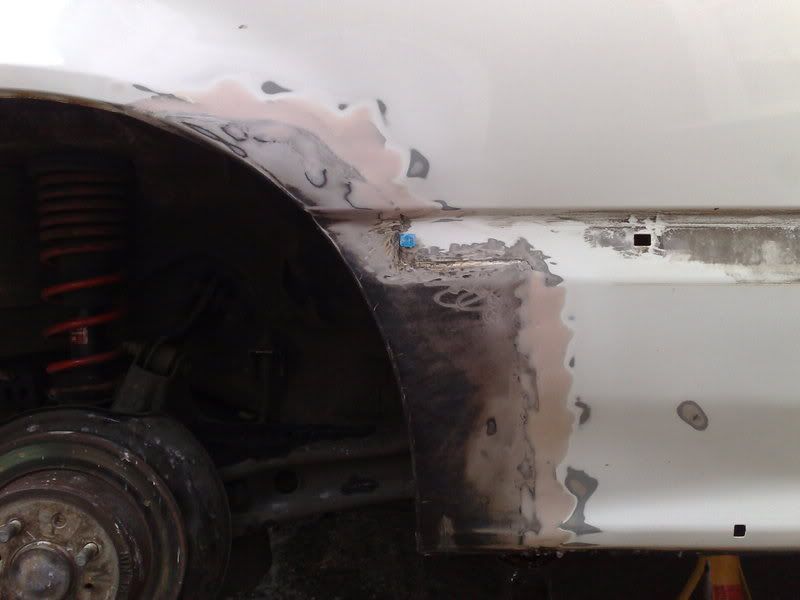
then as it had started to go damp i dried the panel off and dusted over with some white primer and left to dry while i tidied up
its nowhere near finished as i need to re filler and get it nice and smooth so im happy with it
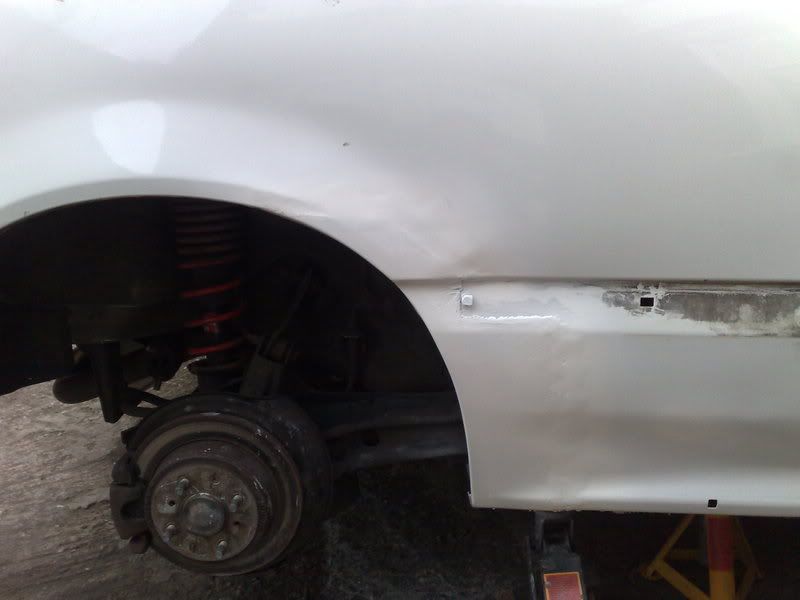
not that bad for my first attempt lol
this is how the end of my sill looked when i jacked car up and removed wheel and a bit of mud lol
i ground some of the rust back on the arch, it was right through and it was the inner arch that was really rusty
so i cut my repair panel out and ground sill back to suit and welded it on (not the best of welders as it was only my second attempt lol)
then ground the welds back a touch
then got on with grinding the crap metal back inside the arch so i could repair the inner arch and sill.
at this point i had to patch the inside of the sill (by the rta bush) but never took a pic
i then made a template from cardboard so i could fill in the end of the sill and inner arch join where it had rotted worst
i transferred to metal and trimmed it slowly till it fitted nice and started to weld it in
once dry i added loads of underseal lol
i then set about fillering the joint so that the weld wasnt on display
flatted back a touch
and some more
then as it had started to go damp i dried the panel off and dusted over with some white primer and left to dry while i tidied up
its nowhere near finished as i need to re filler and get it nice and smooth so im happy with it
not that bad for my first attempt lol
i-vt gone
b20 gone
mb6


-
danxs
- Lvl5! Turbo Charged Posting
- Posts: 1400
- Joined: Mon Nov 12, 2007 10:48 pm
- Location: walsall - birmingham
i got the panels with the car when i brought it off tahir but i think there from somewhere like beevers. i just cut off the bit i needed and welded it on. ive got to finish the rear of my arch and then this side is rust free, will just need to get my new wing on and the skirt can go back on and its onto the next side
didnt think i could do it my self but i just had a go lol
as for the mig welding stuff i went and picked up some new co2 and some .8 wire and it cost me 12quid so if your not sure on the wire just get some new mild steel welding wire.
didnt think i could do it my self but i just had a go lol
as for the mig welding stuff i went and picked up some new co2 and some .8 wire and it cost me 12quid so if your not sure on the wire just get some new mild steel welding wire.
i-vt gone
b20 gone
mb6